
Canned Tuna
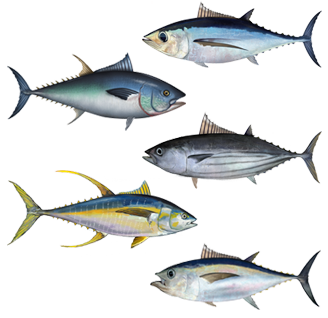
14 servings30 min prep60 min cookMedium
Sign in to rate this recipe.
The Tale of Canned Tuna
Commercial tuna canning began in California in the early 20th century, and home canning of tuna followed as pressure canners became available, letting home cooks and fishing households preserve their catch safely for long-term pantry storage.
Ingredients
Scale:· 14 servings
- 7 pounds fresh tuna loin, skin and dark bloodline meat removed
- Water or light olive oil, optional, a small amount per jar for quality only
- Salt, optional, 1/2 teaspoon per pint jar, for flavor only
Instructions
- 1Understand before you begin that tuna is a low-acid food and must be processed in a pressure canner; a boiling-water bath is never safe for canning tuna or any other fish.
- 2Wash 7 pint jars (half-pint jars also work well) in hot soapy water or a dishwasher and keep them hot; wash new lids and prepare them exactly as the manufacturer instructs.
- 3Trim the tuna loins of skin, dark bloodline meat, and any bruised flesh, since these areas have the strongest fishy flavor.
- 4Bake or steam the tuna pieces until they are only partially cooked, reaching an internal temperature of about 145 degrees Fahrenheit or until the flesh just starts to flake (about 45 minutes to 1 hour in a 350 degree Fahrenheit oven); this hot-pack step firms the flesh and lets excess liquid drain off before jarring, which improves quality.
- 5Let the tuna cool slightly, then cut or break it into pieces sized to fit your jars, discarding any remaining dark meat.
- 6Pack the tuna loosely into the hot jars, pressing only gently to remove large gaps, not compacting it tightly, so heat can penetrate the center of the jar.
- 7Leave 1 inch of headspace at the top of each jar; a small amount of water or oil may be added for quality and texture if you like, but it is optional and not required for safety, since tuna releases its own liquid during processing.
- 8Add salt only if desired for flavor, keeping the 1 inch headspace.
- 9Run a bubble tool carefully around the inside of the jar to release trapped air between pieces, then recheck and adjust the headspace to 1 inch.
- 10Wipe the jar rims completely clean of any oil or fish residue, since oily residue is particularly likely to prevent a good seal, center a lid on each jar, and screw the band down fingertip tight.
- 11Load the jars into the pressure canner, add water as directed by the manufacturer, lock the lid, and vent steam steadily for 10 minutes before pressurizing.
- 12Process half-pint or pint jars of tuna for 100 minutes at 10 pounds pressure in a weighted-gauge canner up to 1,000 feet (15 pounds above 1,000 feet), or 11 pounds in a dial-gauge canner up to 2,000 feet (12 pounds from 2,001 to 4,000 feet, 13 pounds from 4,001 to 6,000 feet, 14 pounds from 6,001 to 8,000 feet); quart jars are not recommended or tested safe for tuna, so use only half-pint or pint jars.
- 13Turn off the heat once processing finishes and let the canner depressurize naturally on its own; never quick-release a canner of fish.
- 14Wait until the gauge reads zero, then wait 2 more minutes, slowly vent any remaining pressure, wait 10 more minutes, then unlock and open the canner.
- 15Move the jars to a towel-lined surface and let them cool completely undisturbed for 12 to 24 hours.
- 16Check that each lid has sealed, wipe the jars clean, label with contents and date, and store in a cool, dark place for up to about 1 year.
- 17Before eating, boil the tuna hard for 10 minutes to destroy any possible botulinum toxin, and discard without tasting any jar with an off odor, spurting liquid, or a lid that never sealed or is bulging.
Want Cook Mode, your own recipe photos, and unlimited calculators?
Get Home Cooking ProComments
Loading comments…
Sign in to leave a comment.